Introduction
If you are training a deep learning model or fine-tuning LLMs (Large Language Models), then at some point in time you need to connect with a remote machine that has required amount of computing power (about 80GB or 320 GB of GPU Memory). Data scientists often use Jupyter Notebooks for experimentation. Jupyter Notebook is designed to run on web browsers. It offers many advantages. However, I am just going to tell you how it simplifies switching compute resources in a single click.
Suppose that you want to train/finetune a GPT model. You do not need to immediately connect to the high-end computing machines and start developing the code as the running cost of GPU’s is very high. Usually, we start experimenting with various models locally (that is, with our laptop/desktop machine). Once we configure everything properly in the Notebook, we just want the run time to switch to GPUs (similar to what we do in Colab). How can we do that with the remote server? Let’s get started.
Start the Notebook in the Remote Server
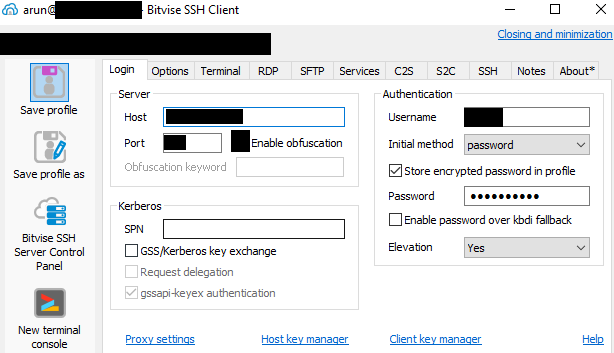
Well, first we need to connect to the remote machine using the required credentials. Most often, we end up using the SSH client. I am using Windows OS and therefore used BitVise client to connect to the remote machine
Once the connection is established, create a virtual environment using Python -m Venv module and install all required libraries and frameworks. If you are using a plain VM (Virtual Machine), you may need to set up everything from scratch, like installing OS (Operating System), updating patches, and so on.
However, if you are working at an organization/research lab then, most likely, the commonly used tools and packages like Jupyter Notebook would already have been installed in the root and made available to all user accounts. It is always a good idea to check the environment variables PATH .
Moreover, it is safe to check whether the path to the python virtual environment /home/arun/env/../bin is added to the PATH variable (modify ~/.bashrc if you want the changes to PATH variable to be permanent). After ensuring all these (small but important things), you can initiate the jupyter notebook without the browser head as shown below

You can choose different port numbers. After executing this, the notebook is up and running and it can be reached via the given port number on the remote host. To listen to this port, we need to port forwarding in the local host machine.
Connect to the Jupyter Notebook from the Local Machine
It is time to establish the connection to the Jupyter Notebook running on the remote server. You can run SSH tunneling with port forwarding as follows ( replace user by your username and ip-address by your ip address ). IMPORTANT: If you are using the Anaconda package manager to run jupyter notebooks on your local machine, then do ssh tunneling in the Anaconda command prompt
ssh -N -f -L 127.0.0.1:8888:127.0.0.1:8888 user@ip-address
Enter your password and that’s all! Open any web browser on the local machine (your laptop) and enter 127.0.0.1:8888. Now, we have access to the jupyter Notebook running on the remote server.
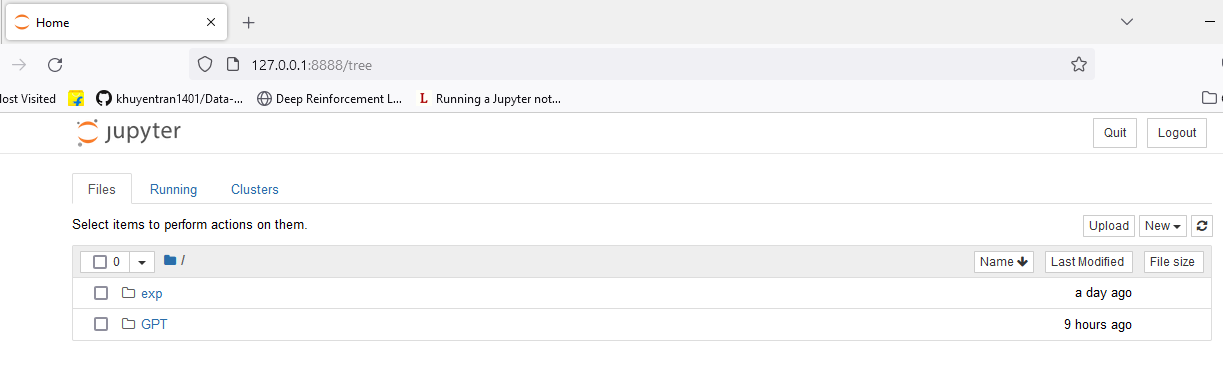
Note that it might ask you to enter the token generated in the remote server. Just copy all the characters after the word token in the link. For ex, if the link is http://127.0.0.1:8888/?token=66b6…06b , then copy all the characters starting from 66b6 to 06b.
Checking the available compute
Great! Now let’s see whether we have access to GPUs. If yes, then view some of their properties. It is always safe to check the free (available) GPUs in a cluster of GPUs before accessing them for your project. Someone in your group may already be using the GPU instances. To check that, use the command nvidia-smi in the terminal and see the status of all GPUs.
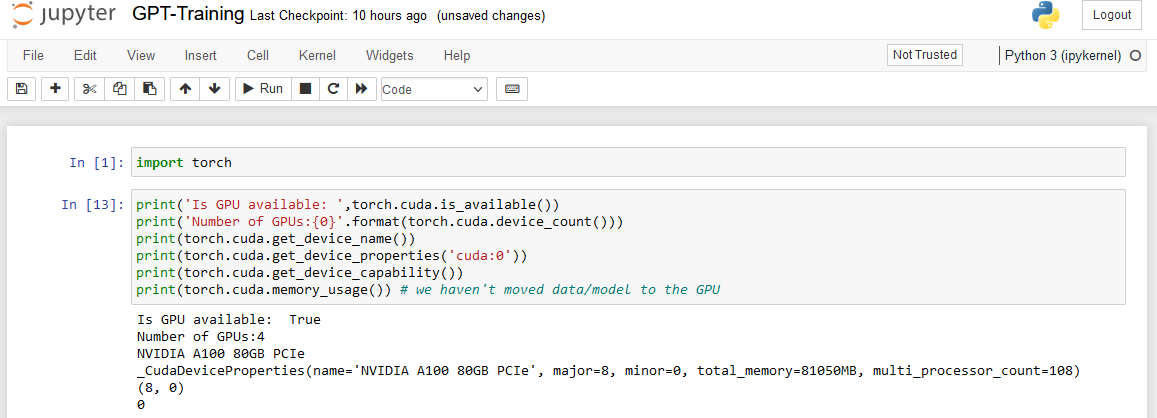
Viola! We have four A100 MI(multi-instance) GPUs with 80GB of GPU memory each. We have everything ready and can start training or finetuning the models. Note that the GPU memory usage is displayed as zero. Because I haven’t moved the data and the model from RAM to GPU. How efficiently we can do this? Is it good to move all the data in RAM to GPU at once? Could Dataloader functionality in PyTorch be of any help? Just explore by experimenting…